|
Minox Dummy
One or the
rarer Minox sub miniature cameras is the shop display dummy. My camera came to me several
years ago at Photographica from a Manchester dealer. I had never seen one before and had
no idea of its value but a deal was struck and I went home with an interesting new item
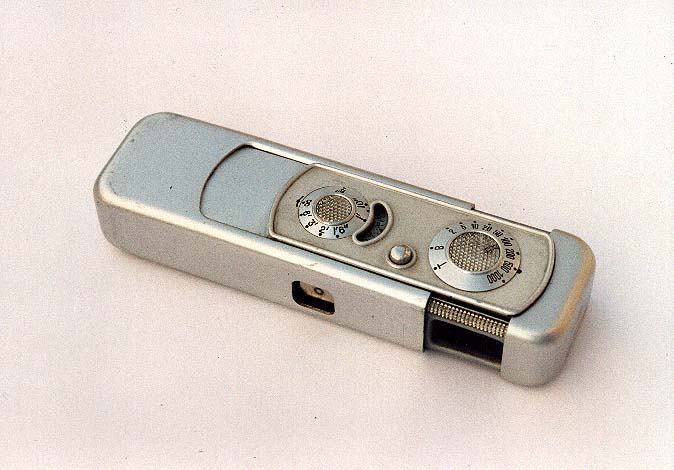
for my collection of subminiatures. The camera model was a type III (could be a II there
is no way to know) and had the number F38 stamped on the bottom next to the extra hole
that was drilled by the factory to ensure that the dealer and customer knew that it had no
internal mechanism. These cameras were first issued in 1951 for shop display when there
was a shortage of working cameras. The only problem with my camera was that it rattled.
The frame counter, the cover where the chain fits and the snap-lock for the back cover
were loose inside. I put it in the display case and thought to myself that one day I will
sort the camera out. Meanwhile the collection continued to grow and the dummy sat on the
shelf looking forlorn. Then at Photographica 98 I saw another dummy III. It didn’t
rattle and looked great so I said to myself that the time was right to repair my camera. A
couple of days later I started to attempt to strip it. The first problem was how to
get inside. Unlike normal precision cameras it was glued together! Looking carefully I
could see a run of glue between the end and top plates, near the shutter dial, so taking a
razor blade I tried to cut the glue with no success. It was obvious that stronger methods
were needed so I “borrowed” my wife’s nail polish remover and dripped the
acetone on to the joint (I did first make sure that no components would be damaged by this
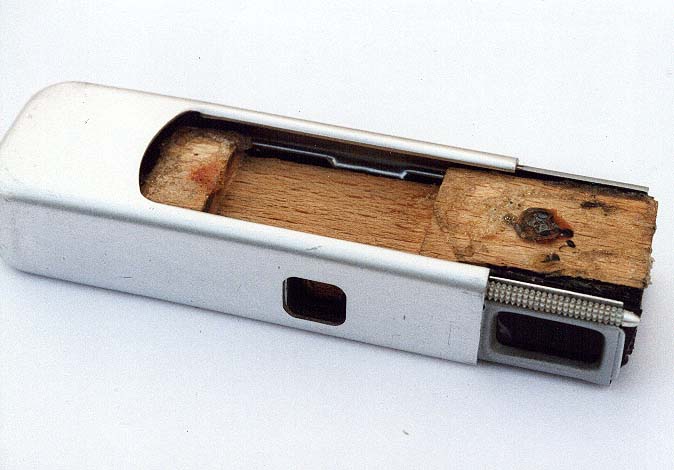
solvent). Eventually the end plate came loose and pulled off revealing a block of wood
covered with glue. I have many wooden cameras in my collection but they are usually made
of polished mahogany and not something that looked as if it had been cut from a tea chest.
It was obvious that the dummy Minox had been assembled, with glue, round this block of
wood. I tried the acetone again but it just wasn’t enough. I gave it a bit of
thought and put the kettle on, not for a cup of tea but for the Minox. My theory was that
the hot water would soften the glue and allow disassembly (remember there was no mechanism
inside). I put the camera in a Pyrex jug and poured on the boiling water, left it
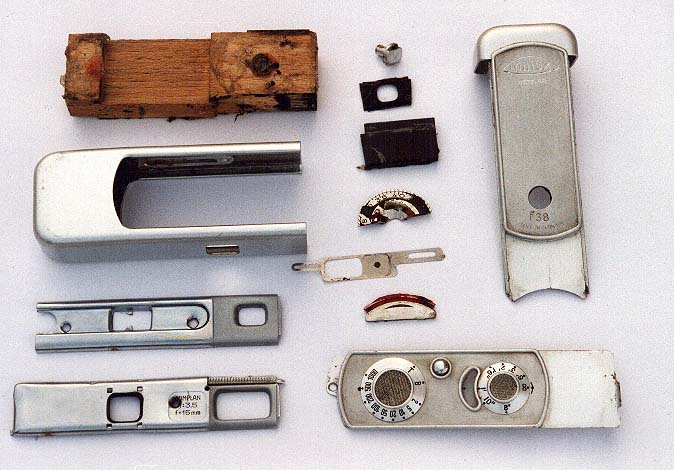
for a few minutes and then easily pulled it apart. The Viewfinder front and back plates
had been held on to the wooden block with wood screws and glue! This assembly had then
been then glued into the outer case. The components included a perfect shutter blade (a
bonus because I had a Minox II with a damaged blade) and half a frame counter dial (I
would imagine that the other half went into another dummy to save manufacturing costs).
After
scraping the remains of the glue from the wooden block re-assembly was easy using adhesive
that could later be dissolved if necessary. Cleaning of the metal was done with soapy
water and my damaged Minox II shutter blade was glued into place.
I now
have a dummy that looks good doesn’t rattle and my extra reward is that after a bit
more work I also have a working Minox II.
The
above technique was specific to stripping the dummy and could not be applied to a normal
working camera, but does show some of the creativity that may be needed when working on
cameras.
This article first appeared in
Photographica World the magazine of the Photographic Collectors Club of
Great Britain
|